Posts

Openssl libssl.so.1.1 not found solve problem

How to solve problem Openssl libssl.so.1.1 not found on your system such as centos, ubuntu. Installing openssl missing depens libssl.so.1.1 not found and libcrypto.so.1.1 not found. Openssl libssl.so.1.1 not found problem as below: [huupv@huupv ~]$ ldd /usr/bin/openssl     linux-vdso.so.1 (0x00007ffe185e6000)     libssl.so.1.1 => => not found     libcrypto.so.1.1 => => not found     libz.so.1 => /lib64/libz.so.1 (0x00007fc3ca6f4000)     libdl.so.2 => /lib64/libdl.so.2 (0x00007fc3ca4f0000)     libpthread.so.0 => /lib64/libpthread.so.0 (0x00007fc3ca2d2000)     libc.so.6 => /lib64/libc.so.6 (0x00007fc3c9f1c000)     /lib64/ld-linux-x86-64.so.2 (0x00007fc3cb2a1000) Openssl libssl.so.1.1 not found solve problem sudo ln -s /usr/local/lib64/libssl.so.1.1 /usr/lib64/libssl.so.1.1 sudo ln -s /usr/local/lib64/libcrypto.so.1.1 /usr/lib64/libcrypto.so.1.1 The result, Openssl libssl.so.1.1 not found solve problem [huupv@huupv ~]$ ldd /usr/bin/openssl     li

Mastering the sed command regex example for Linux

Image
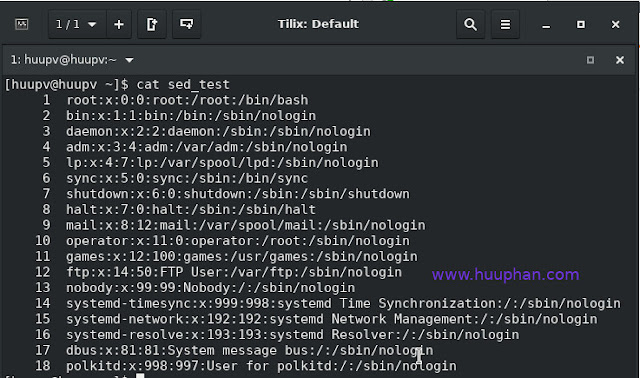
Introduction The sed command in Linux is a powerful stream editor that allows users to filter and transform text in various ways. Whether you're working on system administration tasks or programming scripts, mastering sed can significantly improve your efficiency. In this tutorial, we will explore how to use sed with regex to manipulate lines within a file, focusing on printing lines from one point to another. This guide will help you understand the nuances of sed and its regex capabilities, ensuring you can handle text processing with ease. What is the sed Command? The sed (stream editor) command in Linux is used to perform basic text transformations on an input stream (a file or input from a pipeline). It is commonly used for text substitution, but it also allows you to select and manipulate lines, delete text, and more, using regex (regular expressions). Key Features of sed Text Substitution : Replace occurrences of a pattern with a specific string. Line Selection : Selec

Configure Postfix to use Gmail as a Mail Relay

In this tutorial, I setup and Configure Postfix to use Gmail as a Mail Relay with 587 port. OS : Centos User : root Install postfix yum install postfix mailx cyrus-sasl cyrus-sasl-plain To configure postfix to use Gmail as a Mail Relay vi /etc/postfix/main.cf Add or modify the following as below: #To use smpt gmail with 587 port relayhost = [smtp.gmail.com]:587 smtp_use_tls = yes smtp_sasl_auth_enable = yes smtp_sasl_security_options = noanonymous smtp_sasl_password_maps = hash:/etc/postfix/sasl_passwd smtp_tls_CAfile = /etc/pki/tls/certs/ca-bundle.crt smtp_tls_security_level = encrypt # Location of CA certificates smtp_tls_CAfile = /etc/ssl/certs/ca-bundle.crt To configure Gmail authentication vi /etc/postfix/sasl_passwd Add the line as below: [smtp.gmail.com]:587    username@gmail.com:password Running commands as below: chmod 600 /etc/postfix/sasl_passwd chown root:root /etc/postfix/sasl_passwd /etc/postfix/sasl_passwd.db postmap /etc/postfix/sasl_pas

Nginx redirect all http to https

In this tutorial, How to use nginx redirect all http to https. All traffic http redirect to https for your website. How to do it..... For example, nginx.conf file for your website     server {             listen 80;             listen [::]:80;             if ($host = www.huuphan.com) {                return 301 https://$host$request_uri;            }             if ($host = huuphan.com) {               return 301 https://$host$request_uri;             }             server_name www.huuphan.com huuphan.com;             return 444;             #return 301 https://$server_name$request_uri;     }     server {             listen 443 ssl http2;             listen [::]:443 ssl http2;             server_name www.huuphan.com huuphan.com;             access_log off;             error_log /path/to/logs/error.log;             root /path/to/webroot;             index index.php index.html index.htm;             location / {                try_files $uri $uri/ /index.php?$

centos change ssh port

in this tutorial, How to change ssh port another with selinux. The default ssh port 22, when you change port another with rules selinux (SELINUX=enforcing) get error can't change ssh port. Solve problem!( Running command following with root account) File selinux with content SELINUX=enforcing as below: [huupv@huupv ~]$ sudo cat /etc/sysconfig/selinux [sudo] password for huupv: # This file controls the state of SELinux on the system. # SELINUX= can take one of these three values: #     enforcing - SELinux security policy is enforced. #     permissive - SELinux prints warnings instead of enforcing. #     disabled - No SELinux policy is loaded. SELINUX=enforcing # SELINUXTYPE= can take one of these three values: #     targeted - Targeted processes are protected, #     minimum - Modification of targeted policy. Only selected processes are protected. #     mls - Multi Level Security protection. SELINUXTYPE=targeted How do it... Step 1 : Open sshd_config file # vi /etc/

Centos 7 managing services with Systemd

Centos 7 managing services with Systemd. -List all the current loaded targets as command below: $ sudo systemctl list-units -t target Each services has 3 states; enabled, disabled and static. - To list enabled services as command below: $ sudo systemctl list-unit-files --type=service | grep enabled - To start/stop/restart services as command below: # systemctl status <servicename> # systemctl stop <servicename> # systemctl start <servicename> # systemctl restart <servicename> - To check running ntp services as comman below: $ sudo systemctl list-units --type service --all | grep ntp - Set the service to start a boot: # systemctl enable <servicename> - Disable service start-up boot # systemctl disable service The update later related command line "Centos 7 managing services with Systemd" in this article.

How to Use Bash script Change folder Permissions Recursively

Image
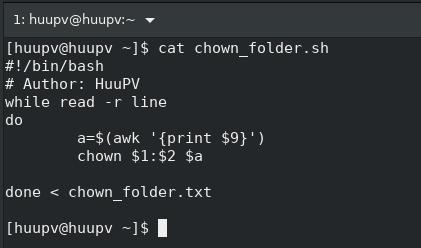
Introduction Learn how to use a bash script to change folder permissions recursively with practical examples. This guide includes step-by-step instructions and script samples to effectively manage file permissions in Linux. Managing file permissions is a fundamental task for any system administrator. Often, you need to change the permissions of a directory and all its contents. This guide will demonstrate how to use a bash script to change folder permissions recursively, with examples covering both basic and advanced scenarios. What is Recursive Permission Change? Recursive permission change applies the specified permissions to the target directory and all its subdirectories and files. This approach is particularly useful for ensuring consistent access controls across complex directory structures. Why Use Bash Scripts for Permission Changes? Bash scripts allow for automation, saving time and reducing errors when changing permissions across multiple files and directories. Scripts can b

List the contents of tar gz file

tar command is archiving utility. Something, you can retrieve extension .tar.gz or .tar.bz2 file. How to list the contents this without extracting from command line. The syntax tar command as below: tar OPTION File_Name With OPTION : t, --list : List the contents of an archive v : Verbosely list files processed j : Filter archive through bzip2 f : filename  You may reading link as below: Iptables how to How to reset password on centos 7 Bash script example List the contents of .tar.gz file To use tar command for .tar.gz as following: $ tar -tvf links-2.12.tar.gz  The output of links-2.12.tar.gz file as below: -rwxr--r-- 1000/1000      1215 2001-10-05 14:03 links-2.12/mailcap.pl -rwxr-xr-- 1000/1000      4654 2015-06-28 22:13 links-2.12/rebuild -rw-r--r-- 1000/1000       461 2003-05-06 01:10 links-2.12/links_16x16_1.xpm -rw-r--r-- 1000/1000      2410 2003-05-06 01:10 links-2.12/links_32x32.xpm -rw-r--r-- 1000/1000      3847 2005-03-01 00:16 links-2.12/links-48x48.xpm -

How to List top sender address emails in zimbra from the Command Line

Introduction Learn how to list the top sender email addresses in Zimbra using simple command-line tools. This comprehensive guide provides step-by-step instructions, explanations of the commands used, and helpful tips to optimize your Zimbra email server management. Zimbra is a widely-used email platform, offering robust features for managing emails within organizations of all sizes. Understanding who the top email senders are within your Zimbra system can be crucial for various reasons, such as monitoring email traffic, identifying potential spam sources, and optimizing your email server's performance. In this guide, we will walk you through the process of listing the top sender email addresses in Zimbra using command-line tools. By the end of this article, you'll have a clear understanding of the commands needed to identify the top senders and how to interpret the results to improve your email management practices. Step-by-Step Guide to Listing Top Sender Email Addresses Ste

How to zimbra add account to distribution list

Image
In this tutorial, How do I use zimbra add account to distribution list by bash script. I’m written bash script for add account to distribution list. You may reading link as below: zimbra some service are not running How to install and configure zimbra multi server How to Restrict Sending to Distribution list in zimbra mail Zimbra add account to distribution list The syntax, create distribution lists command line from root account su - zimbra -c "zmprov adlm distribution_name@example.com huupv@example.com" My bash script for zimbra add account to distribution list as below: #!/bin/bash #Author: HuuPV #Add member to DL echo -n "Input distribute name, pls (Ex: dl01@mail.huuphan.local): " read DL echo -n "Input account add to distribute name, pls (Ex: huupv@mail.huuphan.local): " read AC Check_Member_DL=$(su - zimbra -c "zmprov gdl $DL | grep '\b$AC'") if [ $? == 0 ] then        echo "$AC membe