Secure Your SSH Logins: How to enable SSH 2FA on AlmaLinux
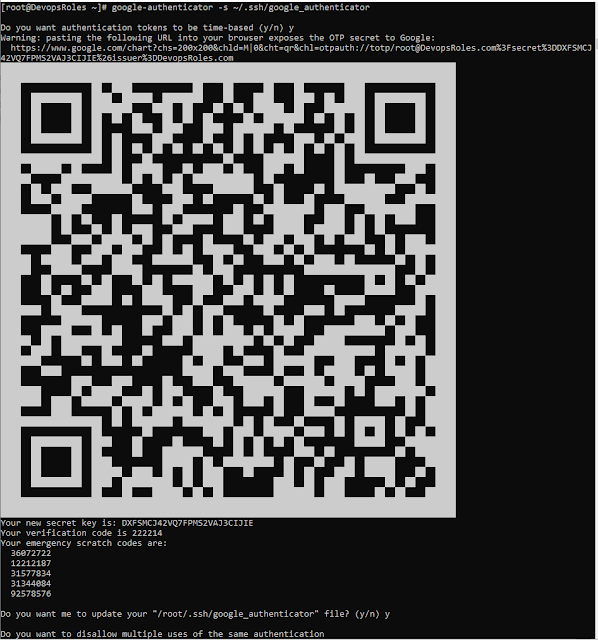
Introduction Enabling two-factor authentication (2FA) for SSH logins on AlmaLinux significantly enhances your system’s security by adding an extra layer of protection. In this tutorial, we'll guide you through the process of setting up 2FA, ensuring your SSH connections are more secure against unauthorized access. This method integrates the use of Google Authenticator, providing a simple and effective way to bolster your server’s defense. Follow these detailed steps to configure 2FA on your AlmaLinux system, and safeguard your data with an additional verification step every time you log in. Install the Google Authenticator on AlmaLinux sudo dnf install epel-release -y sudo dnf install google-authenticator qrencode qrencode-libs -y After install completes, I will create a new secret key in ~/.ssh directory Run command as follows google-authenticator -s ~/.ssh/google_authenticator The output terminal as below [root@DevopsRoles ~]# google-authenticator -s ~/.ssh/google_authenticator ...


