Posts

Showing posts from May, 2017

How to setting password policies in Zimbra

Introduction Setting strong password policies in Zimbra is essential for enhancing the security of your email system. By enforcing robust password requirements, you can protect user accounts from unauthorized access and potential security breaches. In this article, we will guide you through the process of configuring password policies in Zimbra, helping you to implement best practices for password security and safeguard your organization's email communications. How to setting password policies in zimbra? To help your system increase security, password strongest. Setting password policies in Zimbra To get all COS use zmprov command su - zimbra zmprov gac -v | grep Password | sort | uniq To display all attributes as below zimbraFeatureChangePasswordEnabled: TRUE zimbraMobilePolicyAllowSimpleDevicePassword: FALSE zimbraMobilePolicyAlphanumericDevicePasswordRequired: FALSE zimbraMobilePolicyDevicePasswordEnabled: TRUE zimbraMobilePolicyDevicePasswordExpiration: 0 zimbraMobile
How to backup and restore for zimbra mailbox

Introduction Backing up and restoring your Zimbra email system is essential for ensuring data security and continuity. Regular backups protect your organization from data loss due to hardware failures, software issues, or other unforeseen events. In this article, we will guide you through the process of backing up and restoring Zimbra, providing you with the necessary steps to safeguard your email data and ensure seamless recovery when needed. In this tutorial, How to " Backup and restore for zimbra mailbox ". How to backup mailbox for accounts? How to restore mailbox for accounts? Backup and restore for zimbra mailbox The format list_account file as below: [email protected] [email protected] The script backup mailbox for all accounts #!/bin/bash FILE= /tmp/list_account DATE=$(date +"%a") ZMBOX=/opt/zimbra/bin/zmmailbox while read account do      echo "---Generating files from backup $account ---"      $ZMBOX -z -m $account -t 0 g

A Comprehensive Guide to use inotify-tools on centos

inotifywait - wait for changes to files using inotify. When it comes to real-time monitoring of file system events, inotify-tools is an indispensable tool. Especially for CentOS users, mastering inotify-tools can significantly enhance the efficiency of system administration tasks. This guide will walk you through everything you need to know about using inotify-tools on CentOS, from installation to advanced configurations, ensuring that you can leverage its full potential. Introduction to inotify-tools Inotify-tools is a command-line utility that leverages the inotify (inode notify) feature of the Linux kernel, allowing you to monitor file system events. This is incredibly useful for tasks that require real-time responses to file changes, such as automatic backups, log monitoring, and dynamic content updates. Why Use inotify-tools on CentOS? CentOS is widely used in enterprise environments due to its stability and robust performance. By integrating inotify-tools, you can automate and

How to enable swap-drive on linux

Image
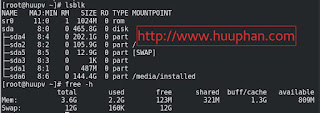
in my post, How to enable swap-drive on linux. The solve problem "Swap Not working" on linux such as centos, Fedora 25.  The open terminal, to check status of swap space ( as run root account) . swapon -s lsblk As the content below NAME   MAJ:MIN RM   SIZE RO TYPE MOUNTPOINT sr0     11:0    1  1024M  0 rom sda      8:0    0 465.8G  0 disk ├─sda4   8:4    0 202.1G  0 part ├─sda2   8:2    0 105.9G  0 part / ├─sda5   8:5    0  12.9G  0 part [SWAP] ├─sda3   8:3    0     1K  0 part ├─sda1   8:1    0   487M  0 part └─sda6   8:6    0 144.4G  0 part /media/installed To turn on swap-drive /dev/sda5 swapon /dev/sda5 To make this permanent start-up on the system vim /etc/fstab  As the content below /dev/sda5 swap swap defaults 0 0 To check, if swap drive that work! free -h As the content below               total        used        free      shared  buff/cache   available Mem:           3.6G        2.2G        123M        321M        1.3G        

zimbra 8.6 cbpolicyd : A Practical Example

Introduction The cbpolicyd service in Zimbra is a powerful policy daemon that helps administrators control email traffic, implement rate limiting, and prevent spam. By setting up cbpolicyd with customized policies, you can enhance the security and efficiency of your email system. In this article, we will provide an example configuration for cbpolicyd in Zimbra 8.6, guiding you through the process to help you optimize your email server's performance and security. Links to below you maybe likes: How to zimbra enforce spf checking for incomming email zimbra 8.6 cbpolicyd How to use cbpolicyd to configure 120 message from sender in last 30s. in order configure in zimbra cbpolicyd policies -->policy_members -->quotas -->quotas_limits To create zimbra-example.sql file BEGIN TRANSACTION; INSERT INTO "policies" (ID,Name,Priority,Description) VALUES(6,'Example CBPolicyd Policies', 0, 'Example CBPolicyd Policies'); INSERT INTO "policy_me