Posts

Run Multiple Commands in Linux

Image
In this tutorial, How to Run Multiple Commands in Linux Linux at Once. You will executing multiple Linux commands at one. On Linux, there are three ways to run multiple commands in terminal. 1. Using Logical OR (ll) operator The syntax command A || command B if command A runs successfully, command B won't execute. Command B will only execute if command A fails Example: sudo find /tmp -name devopsroles.com || touch huuphan.com The output terminal as below 2. Using the AND (&&) Operator The syntax command A && command B Command A runs successfully, If command B not error. Example: mkdir /tmp/devopsroles && cd /tmp The output terminal as below 3. Using the Semicolon(;) Operator The syntax command A ; command B Command A and command B run executed sequentially  The output terminal as below Conclusion Running multiple commands in Linux can significantly enhance your efficiency by allowing you to execute several tasks in a single command line. This tutorial cover...
How to check CPU in Linux

Image
Introduction When it comes to system performance and optimization, understanding the specifications and status of your CPU is paramount. Whether you're a system administrator managing servers or a developer fine-tuning applications, knowing how to check CPU information in Linux is a fundamental skill. In this guide, we'll walk you through various methods to retrieve detailed CPU information using command-line tools available in most Linux distributions. From basic CPU details to in-depth insights, you'll gain the knowledge to effectively monitor and assess the heart of your system's processing power. In today's tutorial, we'll guide you on checking your CPU in a Linux system. Follow these steps: Open the terminal on your Linux system. Type 'lscpu' and press enter to access detailed CPU information. For a quick overview, you can use 'cat /proc/cpuinfo'. If you want real-time CPU usage data, try the 'top' command. Learn about your CPU'...

Display Date and Time for each Command in Bash History in Linux

Image
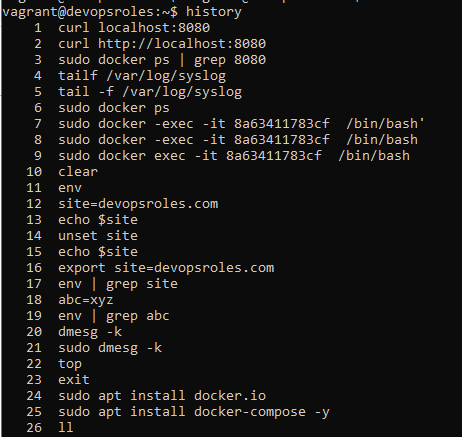
In this tutorial, How to list command display date and time command previously typed in Bash History. The Bash shell provides the command history. Display Date and Time for each Command in Bash History. The default history command $ history The output terminal as below Set time stamps in bash history Define the environment variable name $ HISTTIMEFORMAT="%d/%m/%y %T " The output as below   Or your add ~/.bash_profile file $ echo 'export HISTTIMEFORMAT="%d/%m/%y %T "' >> ~/.bash_profile $ cd $ source ~/.bash_profile The output terminal as below   To retrieve Linux bash command line history $ history  The output terminal as below   Conclusion Displaying the date and time for each command in Linux Linux can be invaluable for monitoring and debugging purposes. By using the HISTTIMEFORMAT variable, you can easily prepend timestamps to your command history, providing a clear record of when each command was executed. This simple yet powerful feature enhances...

Setup a Raspberry Pi Static IP Address

Image
Introduction The Raspberry Pi is an incredibly versatile single-board computer beloved by hobbyists and professionals alike. Setting up a static IP address for your Raspberry Pi is crucial when using it as a server, IoT hub, or for any application requiring consistent network access. This guide provides a comprehensive, user-friendly walkthrough to help you establish a static IP address and ensure reliable connectivity. Why Setup a Static IP Address? A static IP address offers several benefits, including: Reliable Access : Ensures your Raspberry Pi is always reachable at the same IP. Network Stability : Reduces conflicts in DHCP environments. Ease of Configuration : Simplifies the management of devices connected to your network. If your Raspberry Pi hosts services like a web server or VPN, a static IP address is essential for uninterrupted functionality. Prerequisites Before you begin, ensure you have: A Raspberry Pi with Raspberry Pi OS installed. SSH access to your Raspberry Pi (or a...

Fixed Wordpress plugin install Could not create directory

Image
In this tutorial, you'll learn how to fix the "Could not create directory" error during WordPress WordPress plugin installation. The setup involves using Nginx, PHP 7.4, and WordPress on Ubuntu 21.04. The error usually arises due to incorrect directory permissions.  To resolve it, you need to adjust the ownership and permissions of the wp-content directory to ensure the web server can write to it. By following the provided steps, you can ensure seamless plugin installation and a smooth WordPress experience. After install and configure wordpress completed. I have update plugin and could not create directory. I installed into a wordpress directory in /var/www . Nginx does not have permissions to write to the wp-content directory. Wordpress plugin SEO Error Installing Plugin: SEO 17.0 Downloading install package from https://downloads.wordpress.org/plugin/seo.17.0.zip… Unpacking the package… Could not create directory. How to do it Fixed Step 1: Getting the connection info...