Posts

Display Date and Time for each Command in Bash History in Linux

Image
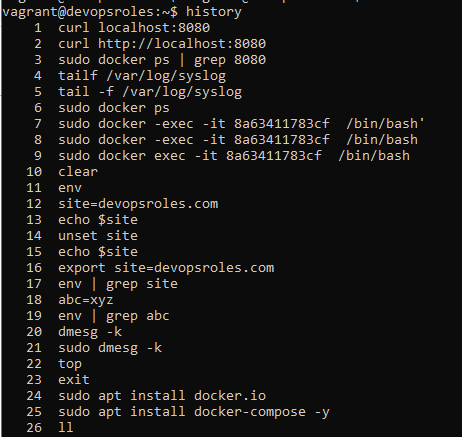
In this tutorial, How to list command display date and time command previously typed in Bash History. The Bash shell provides the command history. Display Date and Time for each Command in Bash History. The default history command $ history The output terminal as below Set time stamps in bash history Define the environment variable name $ HISTTIMEFORMAT="%d/%m/%y %T " The output as below   Or your add ~/.bash_profile file $ echo 'export HISTTIMEFORMAT="%d/%m/%y %T "' >> ~/.bash_profile $ cd $ source ~/.bash_profile The output terminal as below   To retrieve Linux bash command line history $ history  The output terminal as below   Conclusion Displaying the date and time for each command in Linux Linux can be invaluable for monitoring and debugging purposes. By using the HISTTIMEFORMAT variable, you can easily prepend timestamps to your command history, providing a clear record of when each command was executed. This simple yet powerful feature enhances...

Setup a Raspberry Pi Static IP Address

Image
Introduction The Raspberry Pi is an incredibly versatile single-board computer beloved by hobbyists and professionals alike. Setting up a static IP address for your Raspberry Pi is crucial when using it as a server, IoT hub, or for any application requiring consistent network access. This guide provides a comprehensive, user-friendly walkthrough to help you establish a static IP address and ensure reliable connectivity. Why Setup a Static IP Address? A static IP address offers several benefits, including: Reliable Access : Ensures your Raspberry Pi is always reachable at the same IP. Network Stability : Reduces conflicts in DHCP environments. Ease of Configuration : Simplifies the management of devices connected to your network. If your Raspberry Pi hosts services like a web server or VPN, a static IP address is essential for uninterrupted functionality. Prerequisites Before you begin, ensure you have: A Raspberry Pi with Raspberry Pi OS installed. SSH access to your Raspberry Pi (or a...

Fixed Wordpress plugin install Could not create directory

Image
In this tutorial, you'll learn how to fix the "Could not create directory" error during WordPress WordPress plugin installation. The setup involves using Nginx, PHP 7.4, and WordPress on Ubuntu 21.04. The error usually arises due to incorrect directory permissions.  To resolve it, you need to adjust the ownership and permissions of the wp-content directory to ensure the web server can write to it. By following the provided steps, you can ensure seamless plugin installation and a smooth WordPress experience. After install and configure wordpress completed. I have update plugin and could not create directory. I installed into a wordpress directory in /var/www . Nginx does not have permissions to write to the wp-content directory. Wordpress plugin SEO Error Installing Plugin: SEO 17.0 Downloading install package from https://downloads.wordpress.org/plugin/seo.17.0.zip… Unpacking the package… Could not create directory. How to do it Fixed Step 1: Getting the connection info...

Rclone backup all VPS to microsoft onedrive

In this tutorial, How to use Rclone backup all VPS to microsoft onedrive. It's very simple, free to backup all to Cloud with Rclone. Rclone supports a lot of Cloud services Google Drive Amazon S3 Openstack Swift / Rackspace cloud files / Memset Memstore Dropbox Google Cloud Storage Amazon Drive Microsoft OneDrive Hubic Backblaze B2 Yandex Disk SFTP The local filesystem Install Rclone on VPS Link direct download here : I use Ubuntu server on VPS. cd /root/ wget https://downloads.rclone.org/rclone-current-linux-amd64.zip unzip rclone-current-linux-amd64.zip cp rclone-v*-linux-amd64/rclone /usr/sbin/ rm -rf rclone-* Rclone command basic rclone config – Configure the connection to the cloud service. rclone copy – Copy files from server to cloud, skip if data already exists. rclone sync – Synchronize between server and cloud, only update data on cloud. rclone move – Move files from server to cloud. rclone delete – Delete the data of the folder. rclone purge – Deletes the data of the fol...

Guide to Issue Let's Encrypt certificates for multiple websites Nginx

Introduction Learn how to issue Let's Encrypt certificates for multiple websites using Nginx . This comprehensive guide covers installation, configuration, automation, and more, ensuring your websites stay secure and compliant. Securing your websites with SSL/TLS certificates is crucial for protecting data, enhancing user trust, and improving search engine rankings. Let's Encrypt offers a free, automated, and open-source solution for obtaining SSL certificates, making it easier than ever to secure your websites. In this tutorial, we will walk you through the steps to issue Let's Encrypt certificates for multiple websites using Nginx. By following this guide, you'll be able to configure Nginx to use SSL, automate the renewal process, and ensure all your sites remain secure. What is Let's Encrypt? Let's Encrypt is a certificate authority that provides SSL/TLS certificates for free. It automates the process of certificate issuance, making it accessible even for use...

How to Install Caddy on Ubuntu

Introduction Caddy is an innovative, user-friendly web server that simplifies website management with its automatic HTTPS capabilities and straightforward configuration. Known for its exceptional ease of use, Caddy has quickly become a preferred choice for developers looking to deploy web servers with minimal hassle. In this guide, we will walk you through the steps to install Caddy on Ubuntu, ensuring you can leverage its powerful features for your web projects. Prerequisites A Ubuntu OS. A root user access or normal user with administrative privileges. Installing Caddy on Ubuntu  Step 1: Update Your System Before installing any new software, it's crucial to ensure that your system is up to date. Open your terminal and run the following commands: Copy code sudo apt update sudo apt upgrade -y These commands will refresh your package list and install the latest updates for your installed packages, ensuring your system is prepared for the Caddy installation. Step 2: Add Caddy's ...

How to installing Docker in Raspberry Pi 4: A Step-by-Step Guide

Introduction Learn how to install Docker on a Raspberry Pi 4 with our step-by-step guide. Set up Docker, Docker Compose, and deploy your first application on Ubuntu OS. Perfect for developers and enthusiasts. The Raspberry Pi 4 is a versatile mini-computer, ideal for running a variety of applications, including Docker containers. Docker is a powerful platform that simplifies application deployment by packaging software into containers. This guide will walk you through the process of installing Docker on a Raspberry Pi 4, using Ubuntu OS as the operating system. Whether you are a developer, a system administrator, or a tech enthusiast, this tutorial will provide you with the knowledge to get Docker up and running on your Raspberry Pi. What is Docker? Docker is an open-source platform that automates the deployment, scaling, and management of applications. It allows you to package an application and its dependencies into a standardized unit called a container. Containers are lightweight...

Master the curl command cheat sheet

Introduction Learn how to use the curl command like a pro with this in-depth guide. This cheat sheet covers everything from basic HTTP requests to advanced options, helping you make the most out of curl’s powerful features. The curl command is one of the most powerful and versatile tools available in the Linux command line for making HTTP requests and interacting with a wide range of protocols. Whether you're fetching data from a web server, uploading files via FTP, or simply testing an API, curl has got you covered. This guide aims to be your go-to resource for mastering the curl command, offering a detailed cheat sheet along with practical examples to help you understand and utilize its full potential. If you’ve ever found yourself lost in the myriad of curl options and flags, this article is for you. With over 1600 words of detailed explanations, you’ll walk away with the knowledge needed to leverage curl like a true Linux expert. Let’s dive in! What is Curl? Curl stands for Cl...